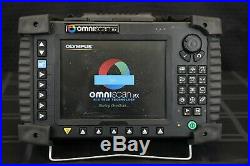
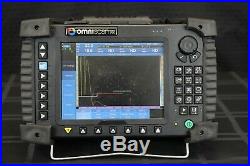
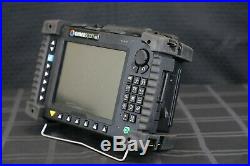
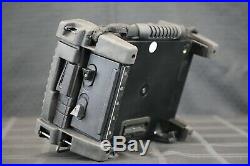
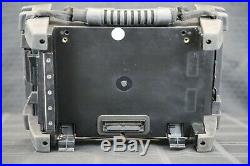
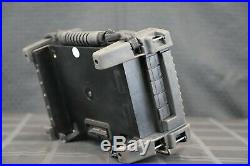
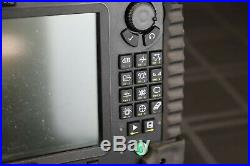
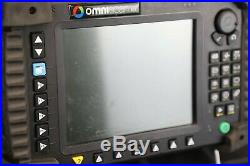
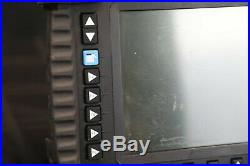
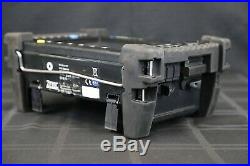

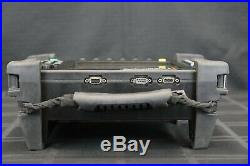

Olympus Omniscan MX1 Mainframe Only. With hundreds of units used throughout the world, the R/D Tech OmniScan MX is Olympus NDTs most successful modular and portable phased array and eddy current array test unit. The OmniScan family includes the innovative phased array and eddy current array test units, as well as the eddy current and conventional ultrasound modules, all designed to meet the most demanding requirements of NDT! The OmniScan MX offers a high acquisition rate and powerful software features in a portable, modular mainframe to efficiently perform manual and automated inspections! Rugged, Portable, and Battery-Operated. The OmniScan is built to work in the harshest field conditions. Its solid polycarbonatebased casing and rubber bumpers make it a rugged instrument that can withstand drops and shocks. The OmniScan is so compact and lightweight (only 4.6 kg) that it can be carried easily and handled anywhere inside or outside. The OmniScan will run 6 hours with its two Li-ion batteries. The highly legible 8.4-inch real-time display (60-Hz A-scan refresh rate) with a SVGA resolution of 800 x 600 allows you to clearly see defects and details under any light conditions. A scroll knob and function keys make it easy to browse through and select functions. A mouse and a keyboard can also be plugged in for users looking for a more PC-like interface. The instrument is a modular platform that allows you to switch among its different test modules on location. The platform detects the new module and the technology supported so that the configuration and test environment are set automatically. The OmniScan connector has a probe ID feature that enables physical detection and recognition of the probe connected to the mainframe. Sets the probe to an appropriate frequency to prevent probe damage. Sets C-scan resolution of ECA probes. Loads the correct probe parameters. Setup storage compatible with Microsoft® Windows® (exportable using a CompactFlash® card) Complete report setup including reading configuration, which can be customized using HTML page layout On-screen interactive help that can be customized for procedure-oriented setups using HTML script templates Setup preview Predefined setups Connectivity, Data Storage, and Imaging The OmniScan® offers alarm outputs as well as the standard PC ports: USB, SVGA out, and Ethernet. It offers internal data storage capability and extended storage via a CF (CompactFlash®) card slot, as well as any USB or network storage. Olympus NDT has developed a circumferential weld inspection system based on the OmniScan PA for the oil and gas industry. This phased array system is qualified to inspect tube with diameters ranging from 48 mm to 1524 mm and thicknesses from 5 mm to 25 mm in compliance with ASME Boiler and Pressure Vessel Code Section V. The semiautomated system offers better inspection speed and detection, and makes the interpretation of the indications significantly easier. Pressure Vessel Weld Inspection. The combination of time-of-flight diffraction (TOFD) and pulse-echo techniques means that the complete inspection is done in a single scan, significantly reducing the inspection time when compared to conventional raster scanning or radiography. Inspection results are available instantaneously, allowing you to spot a problem with the welding equipment and fix it right away. Based on our vast experience in the nuclear and petrochemical industries, this system includes all the functions that are needed for code-compliant weld inspections. Scribe Marks Inspection with No Paint Removal. The Flight Standards Information Bulletin for Airworthiness (FSAW 03-10B), issued on November 2003, report damage along fuselage skin lap joints, butt joints, and other areas of several aircraft caused by the use of sharp tools used during paint and sealant removal. The OmniScan allows the scribe marks inspection to be done without paint removal which is a huge time saver. The inspection is done in a single pass using 60º to 85º SW sector scans. OmniScan PA is now referenced in the Boeing NTM manuals, 737 NDT Manual, Part 4, 53-30-06, July 2005. The OmniScan ECA (eddy current array) provides the ability to detect hidden corrosion and cracks in multilayer structures. Currently, material loss of 10% of the lap splice thickness can be detected in aluminum at a depth of 0.2 in. Surface and subsurface cracks can be detected in the skin, at the fastener, or at the lap joint edges. Time-of-Flight Diffraction (TOFD) Testing TOFD is a technique that uses two probes in pitch-and-catch mode. TOFD detects and records signals diffracted from defect tips for both detection and sizing. The TOFD data is displayed in a grayscale B-scan view. TOFD offers wide coverage and amplitudeindependent sizing compliant with the ASME-2235 code. One-line scan for full-volume inspection Setup independent of weld configuration Very sensitive to all kinds of defects and unaffected by defect orientation. Time-of-Flight Diffraction (TOFD) and Pulse-Echo Testing While TOFD is a very powerful and efficient technique, it suffers from limited coverage resulting from two dead inspection zones: one dead zone is near the surface, the other is at the backwall. OmniScan UT allows inspections simultaneously combining TOFD with conventional pulse echo. Pulse echo complements TOFD and covers the dead zones. TOFD inspection 45º pulse-echo for weld cap inspection on either sides of the weld 60º pulse-echo for weld root inspection on either sides of the weld. 0-Degree Testing (Corrosion and Composite). The 0-degree testing measures time-offlight and amplitude of ultrasonic echoes reflecting from the part into gates in order to detect and measure defects. C-scan imaging Full A-scan recording with C-scan postprocessing. Olympus NDT offers thousands of transducers in standard frequencies, element diameters, and connector styles. Contact and immersion transducers Dual transducers Angle beam transducers and wedges Replaceable delay line transducers Protected-face transducers Normal incidence shear wave transducer. Monitors amplitude, peak position, crossing level position, and thickness on each gate Automatic gate synchronizes from previous gate for higher dynamic range of thickness. A-scan data storage and C-scan postprocessing capabilities Optional IF gate for surface following synchronization or measurement gate or TCG/DAC curves Either positive or negative gate on RF signal (independent for each gate) Eight alarms completely configurable on single gate events or multiple gate events, filter for n occurrences from one or multiple channels Customizable color palette for amplitude and thickness C-scan Adjustable 256-level color palette 2-axis mechanical encoder with data acquisition synchronization on mechanical movement Optional data library to access A-scan and/or C-scan on PC for custom processing. Easy-to-interpret cross-sectional view of inspected part Excellent display of corrosion mapping of boilers, pipes, and storage tanks Visual identification of the thickness values acquired Encoded TOFD capability for amplitude-independant defect sizing. Color-selectable A-scan display Reject mode Hollow mode Peak-hold mode (always keeps the signal that shows the maximum amplitude in gate A) Gate threshold level crossing (changes the color of the curve that is over the gate level) 60 Hz A-scan refresh rate with overlays of envelope and peak inside the gate. All calibration procedures are guided using step-by-step wizards. Sound velocity calibration Wedge delay calibration TOFD calibration TCG calibration Encoder calibration. B-scan encoded data imaging and storage Adjustable for brightness and contrast grayscale color palette 100 MHz A-scan digitizing TOFD calibration wizard online and offline Hyperbolic cursor and reading for TOFD sizing Lateral wave resynchronization. Trade Ins: We offer some of the highest prices on your used test equipment. An estimated trade in value will be assessed within 24 hours of receiving a value request. We leave feedback as soon as we get feedback from you. All sales include a 3 day right of return (ROR). We put great effort into thoroughly documenting each piece of equipment, typically with very detailed pictures and video clips. We strongly encourage you to study these images closely before you commit to purchasing the item. The item “Olympus Omniscan MX Phased Array Flaw Detector Mainframe Only Eddyfi Zetec NDT” is in sale since Monday, November 4, 2019. This item is in the category “Business & Industrial\Test, Measurement & Inspection\Test Meters & Detectors\Ultrasonic Flaw Detectors”. The seller is “kosmik-surplus” and is located in Pooler, Georgia. This item can be shipped worldwide.
- MPN: LTC 600 LT USN DMS GO
- Brand: Olympus

